It's going to get very glittery up in here! Crazy 4 Challenges team member Rebecca Ednie says summer, water + sunshine always makes her think of glitter. So, let's use lots of glitter on our projects this week. Ok then!
I went all glittered out! I placed a piece of Clear Double Sided Adhesive onto a piece of white card stock and die cut the shapes using Karen Burniston's Nature Edges. After die cutting, I covered them all with Silk Microfine Glitter from Elizabeth Craft Designs. I put the pieces back together like a puzzle onto a piece of white card stock, die cut a few hearts and then adhered it to the white mat. I wanted the sentiment to stand out a little more so I put it on a decorator label from Twist Panel Pop Up. The sentiment is from Word Set 1 - Greetings. The inside of the card has a white mat with the 3 little hearts that were cut out on the front.
Happy Stampin',
Raquel
To purchase Stampin' Up! products, please visit Stampin' Up! and enter Raquel Mason as your demonstrator.
To purchase Karen Burniston's new products click here.
To purchase Elizabeth Craft Designs products, please visit your local independent craft store or online.
Supplies
Karen Burniston - Nature Edges, word Set 1 - Greetings, and Twist Panel Pop Up
Elizabeth Craft Designs - Silk Microfine Glitter in Lavender Ice, Violet, Peony Pink, Amethyst, and Fuchsia; Clear Double Sided Adhesive
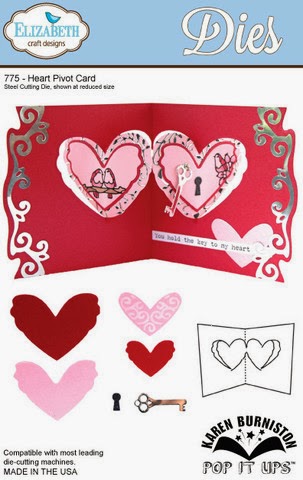
 It's time for the Karen Burniston Designer Challenge! This month's theme is to make any Pop It Up for Mamas & Babies. I used the Heart Pivot Card for my base & some companion dies from Lucy Label for the sentiment. To get the polka dot paper lined up perfectly, put tape runner all over the DSP, stick it to the base card & then cut. To make the red heart frame around the glittered heart, I used the Heart Pivot die to cut the shape, left the die on the paper, traced around the edges with a pencil & hand cut where I drew my pencil lines.
To get a portion of the sentiment onto the Lots of Pops label, I used a Basic Black Stampin' Write Marker to ink only the portion I wanted, huffed onto the stamp, stamped onto Whisper White & then die cut. I traced around the edges of the sentiment with a Spectrum Noir Marker & a blender pen. For the little hearts, they were cut from glittered paper & colored with Spectrum Noir Markers.

Here's the card view when opened, fun right? There's lots of little details to talk about, so lets start with the left side.

I used the flagpole from Lots of Pops & covered it with Red Silk Microfine Glitter. The heart on the flagpole was cut from a die included in the Heart Pivot Card. The large heart & the heart with the black outline is a Peel-Off Sticker. I applied Double Sided Adhesive to Whisper White, put the heart stickers on, then sprinkled with Cool Silk Microfine Glitter, then colored with Spectrum Noir Markers & a blender pen. I used the Heart Pivot Card die to cut the large glittered Heart Peel-Off Sticker to fit the pivot area.
The sentiment is from Delightful Dozen & I used Stampin' Write Markers to ink up the ombre "Mother". I left the die cut in the die & used my marker to trace around the edge.

I used some of the companion dies included in the Heart Pivot to decorate the right pivot side of my card. The little tiny heart is from the Oval Accordion Card set. To attach the twine, I punched a small hole in the top of the pivot heart & tied a knot. Next I punched little holes in each heart, used a jump ring to attach them to the twine & tying a knot on each so they don't all slide down onto the key. The end of the twine is hidden behind the other Red glittered flagpole. Let's talk about the key shall we? The key was made using a mixture of Black & White Silk Microfine Glitter as Karen Burniston showed on last month's DC card. I really like how it makes the key & keyhole look rustic.

Here's a top view where you can see how the twine hangs from the center heart.
I hope you enjoyed this card as much as I enjoyed making it. Thanks for stopping by my blog & all comments are read & appreciated.
Happy Stamping,
Raquel
To purchase any Stampin' Up! Products, please visit my online store.
To purchase Elizabeth Craft Designs products, please visit your independent local retailer or online.
All supplies are Stampin' Up! unless noted
Stamps: Delightful Dozen
Paper: Real Red, Whisper White, Modern Medley DSP
Stampin' Write Markers: Regal Rose, Basic Black, Real Red
Dies: Heart Pivot Card #775, Lots of Pops #778, Lucy Label Pop Up #779, Oval Accordion Card #782 (Elizabeth Craft Designs)
Accessories: Red & Cool Warm Diamond Silk Microfine Glitter, heart Peel-Off Sticker #2553 (Elizabeth Craft Designs)
Spectrum Noir Markers
 I cut my base card at 5.5 x 8.5 from Regal Rose, added a layer of Basic Black & then Whisper White covered with Double Sided Adhesive....and that's where the magic happens. Take a piece of Whisper White & a piece of Double Sided Adhesive cut to the same size, remove the backing on the DSA & stick it to the Whisper White. Die cut 4 of each size from the Rose #799 die from Black Velvet Adhesive Sheets. Remove the release sheet & now you have a sticky surface to stick the Rose die cuts to. Now you can cover the entire Whisper White with Cool Diamond Silk Microfine Glitter, shake off excess & polish the glitter in with your finger.
After you've polished it, the glitter really sparkles & you're ready to color. To color, I used Stampin' Write Markers in Daffodil Delight, Crushed Curry, Peach Parfait, Pink Pirouette & Melon Mambo. This is the first time I have tried using Stampin' Write Markers & I think they worked great but took a little longer to dry than alcohol based markers.

It was hard to capture all the glittery goodness of this card - BUT believe me that it IS very glittery! After I finished coloring the roses, I added a strip of Melon Mambo Scallop Dots Ribbon to the bottom. The sentiment is from the stamp set called Too Kind & it's stamped on a scallop oval from Karen Burniston's Oval Accordion Card die. To get the yellow in the center & keep the edges white, simply put the die back over your die cut & sponge with Daffodil Delight Classic Ink.

Here's a close up of all the beautiful Cool Diamond Silk Microfine Glitter. I love this glitter, it is so soft like powdered sugar & it's texture is very smooth once you've applied it to your card stock. I colored around the roses with my markers & let it fade out into the white.

Here's the inside of my card. I added a layer of Basic Black, Whisper White & Melon Mambo Scallop Dots Ribbon. I die cut the Rose stem from Old Olive & the bud from Regal Rose and Black Velvet Adhesive Sheets. I seriously thought about glittering this rose too, but I liked the crisp clean look of just the Black Velvet outline over the Rose.
To purchase any Stampin' Up! products, please visit my online store.
To purchase any Elizabeth Craft Designs products, please visit your independant local retailer or online.
Happy Stamping,
Raquel
Supplies are Stampin' Up! unless noted
Stamps: Too Kind
Paper: Regal Rose, Basic Black, Old Olive, Whisper White
Black Velvet Adhesive Sheets & Double Sided Adhesive Sheets(Elizabeth Craft Designs)
Ink: Basic Black Classic Ink
Stampin' Write Markers: Daffodil Delight, Crushed Curry, Peach Parfait, Pink Pirouette, Melon Mambo
Dies: Rose #799 & Oval Accordion Card #772 (Elizabeth Craft Designs)
Accessories: Melon Mambo Scallop Dots Ribbon
Cool Diamond Silk Microfine Glitter #641, 5 x 12 Double Sided Adhesive (Elizabeth Craft Designs)