Saturday, November 28, 2015

Crazy 4 Challenges - National Square Dancing Day

Tomorrow is National Square Dancing Day.  To help celebrate this day, think "Square" and make a square card or use square elements on your card.  This is the challenge set forth from our Crazy 4 Challenges hostess this month.
I used watercolor pencils to color Stampin' Up!'s Christmas Cuties and added a Spider Web Doilies (turn them around and they're white for an awesome snowflake).  
The sentiment is from Happy Scenes that I stamped onto a smaller Lucy Label.  The flourish is from Karen Burniston's Sleigh Gift Card Holder - such pretty swirls to go along with the little snowflake included in that very same set.
Happy Stampin', 
Raquel


To purchase Stampin' Up! products, please visit my online store.


To purchase Pop It Ups designed by Karen Burniston for Elizabeth Craft Designs, please visit your local independent craft store or online.


Built for Free Using: My Stampin Blog

Saturday, November 21, 2015

Crazy 4 Challenges Sketch - Butterfly Basics

It's sketch time with Crazy 4 Challenges!  I stamped the flowers from Stampin' Up!'s Butterfly Basics stamp set using Versamark and Black Stampin' Emboss Powder onto the oval and colored using Stampin' Write Markers.
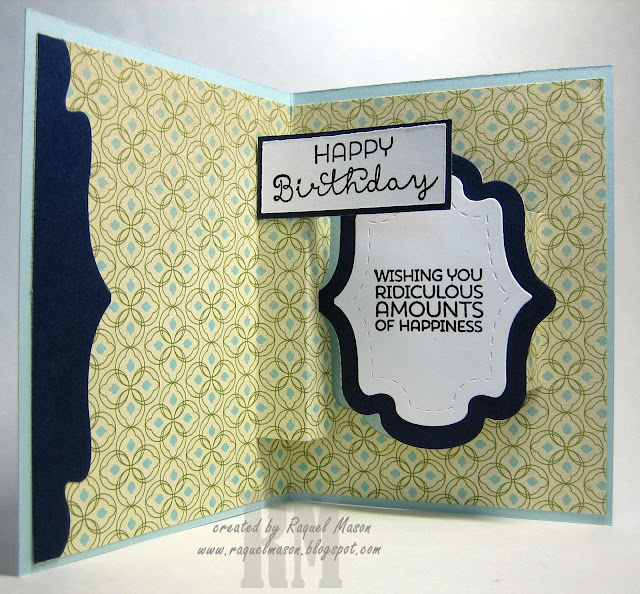
For the inside of the card, I used Karen Burniston's Lorna Label turned on its side.  I used the rectangle bump to attach the sentiment from Stampin' Up!'s Cottage Greetings stamp set.
Happy Stampin', 
Raquel


To purchase Stampin' Up! products, please visit my online store.


To purchase Pop It Ups designed by Karen Burniston for Elizabeth Craft Designs, please visit your local independent craft store or online.


Built for Free Using: My Stampin Blog

Tuesday, November 17, 2015

Karen Burniston Designer Challenge - Video Techniques 2nd Day: Rocky Doffs his Cap

Karen Burniston challenged the team to give our adaptation of any of her previous Designer Challenge videos.  I love Rocky the Crab and the card "Rocky Doffs his Cap" has such a cool techniue - so I decided I was going to give it a go....here's what I came up with.

Please read the entire post to find out how you can get a $10 gift card from Elizabeth Craft Designs.

I used Rectangle Pull Card as my base along with Sleigh Gift Card.  I used the companion rectangle in the set to die cut the window so you can view the inside of the card while in the closed position.  I used the Merry & Bright stamp set to stamp some snowflakes & the sentiment.
When you open the card you see Chilly the Penguin holding a present!  I made Chilly the Red Nose Reindeer!  The brads allow Chilly to move while being attached to the spinner.  Chilly's antler wasn't wide enough to attach the brad so I added the little snowflake from Sleigh Gift Card.  The red brad is what attaches his arm & allows movement.  The small red brad in the bow is attached to the pattern paper & then adhered to the card so the brad doesn't show through the back of the card.
Here's a little video of how the card opens.


To coincide with the November Designer Challenege, every purchase made over $40 of Karen Burniston Pop it Ups will receive a FREE $10 Gift Card. You will receive your Gift Card with your order in the mail and your Gift Card can be used on the Elizabeth Craft Designs website. This offer only applies to purchases made on our website between Tuesday, November 17th and Thursday, November 19th.

Happy Stampin',
Raquel

To purchase Stampin' Up! products, please visit my online store.


To purchase Pop It Ups designed by Karen Burniston for Elizabeth Craft Designs, please visit your local independent craft store or online.


Built for Free Using: My Stampin Blog

Monday, November 16, 2015

Karen Burniston Designer Challenge - Video Techniques: Seamless Backing

It's that time of the month again!  Time for Karen Burniston's Designer Challenge of course.  The team was challenged to use any technique from any of Karen's Pop It Ups videos and use it for a card of any theme.  We are to put a "Spin" on it and make them even better!  I mean how can you make any of Karen's videos better right?  So I decided to double her Seamless Backing technique.
I followed Karen's instructions for the "Outside Border" Seamless Backing and added Glitter Borders around all the edges.  On the tree, I used the embossing paste and the companion dies included in the Evergreen Pivot Card to create depth.  While the embossing paste was still wet I covered it with Solar Gold Silk Microfine Glitter.
For the sentiment, I used a stamp from Karen's Merry & Bright stamped with Versamark and gold embossing powder then die cut with the largest companion die. 

For the inside "Outside Border" I followed the same instructions including die cutting another small portion of the pivot portion of the trees.  To adhere the panels I cut the pivoting portion of the trees, apply liquid glue to the pattern paper & slid them into place.  I cut a small piece of Old Olive to adhere the pivot portion back together.

Here's the view from the back so you see the little patch on the pivoting area.

Happy Stampin', 
Raquel

To purchase Stampin' Up! products, please visit my online store.


To purchase Pop It Ups designed by Karen Burniston for Elizabeth Craft Designs, please visit your local independent craft store or online.

Built for Free Using: My Stampin Blog